Saturday, March 27, 2010

Sourdough Bread


As I write these posts it has become clear to me, that what I really enjoy making is "live" food. Food that grows and ripens. So in that continuing theme today I will share my experiences with
Sourdough.

I discovered great Sourdough bread when my Mom and I used to travel to Alaska. And each year I would bring home "dry sourdough starter" and something was just not right. This recipe I am sharing today qualifies as great sourdough as far as I am concerned. And as you will see it is quite versitle.

This originally is an artisan bread recipe. Which means it is baked on a stone or tiles. I was really excited about this - until - I realized that with my crutches, manuvering the bread and the stone was just too dangerous. I could just see myself falling face first into the oven. So I improvised and put it into a regular bread pan and it turns out just fine. Then I found a blog where a mom of 6 shared about a Pullman Bread Pan. This is a 6 sided bread pan w/sliding lid.


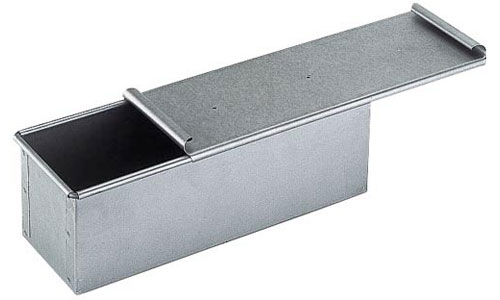
I used the Pullman Bread Pan for the first time today and it is wonderful. It makes a rectangular loaf of bread, so you can make your own "sliced bread" for about the price of 40 cents each. Not bad, huh? The pan itself though is incredibly expensive. So you have to watch amazon and ebay and get a good price. See how much they cost regularly first, (google them at retail), then you are able to decide a real bargain. It took me several weeks to find one that I thought was reasonable, so don't give up.

So I have made this bread 2 ways, a loaf and day slicing bread. Next week I shall try English Muffins with it, which I am sure I will blog about after. Let's get to the recipe so you can enjoy bread today.
Sourdough Starter:
Enough for 8 loaves in a bread pan (small pan) or equal 2 loves of slicing bread.
The equation to memorize is: 6-3-3-13-(1)
6 C Luke warm water, 4T Salt, 3T yeast, 3C Flour, & I add 1C homemade yogurt
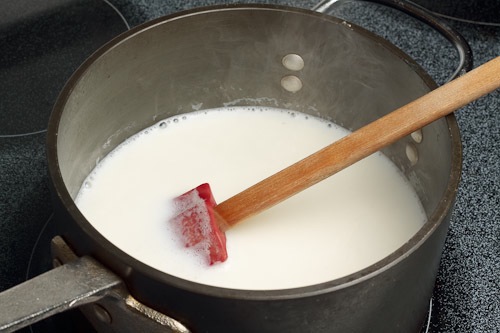
Be sure and put the yeast in the luke water and let it marry for about 10 minutes & become bubbley, creamy, (small bubbles). This is a very moist dough. Fridging it makes it a little easier to deal with.
You let this rise is a bowl, I put the lid over it upside down. You want air to be able to get to it. It rises 2 - 5 hours and then refridgerates for for 3hours. Then you can bake 45 - 60 minutes at 350 degree oven.

Now - let's break this recipe down to smaller versions for rolls at dinner etc:

4 loaves (1 pullman slicing loaf) 3C Lukewarm Water, 1 1/2 T yeast, 1 1/2 T Salt 6 1/2 C Flour 1/2 c yogurt

2 Loaves (good for a couple nights of 6 rolls)
1 1/2 C Lukewarm water, 3/4 T yeast, 3/4 T salt, 3 1/4 C Flour, 1/4 C yogurt.

Let me know how it goes for you. I hope you enjoy this bread as much as we do.

Tuesday, March 23, 2010

Whey can be Way Cool


This is going to be a shorter post today, but still hopefully with enough information to add to your cooking experience. Loki, our St Bernard, is at the vet getting his dew claws cut and we are a little nervous and lonely around here. So bear with me and I think we can do cool things today.


Whey is that almost clear yellow liquid that comes off your yogurt and cheese. Do you remember when I had you save it? Why would we save it?, you must have asked. Because it can be used for a plithera of yummy foods. It is full of great things and can add a richness similar to butter in many foods.


One of the favorite uses for whey is a soup base. As a vegetarian I am always looking for a soup base that is a little more interesting than water and not as time consuming as making my own vegetable broth. This is it. By taking all the whey you have left over from your yogurt and cheese, adn putting it in a big pot you can make your favorite soup. If you don't have enough liquid for your soup, just add water to the whey. Do not worry that there is lemon juice or vinegar in it. It is pretty diluted and will mix well with the other ingredients. If your whey looks a little thick or a little "stringy" do not let it worry you. Remember we are dealing with live food here.


I also use whey when I make bread. Instead of adding water, I add the whey. Cakes, cookies, muffins - you get the idea. I especially like to use the whey when I make sourdough starter. This using a live food with a live food makes your "sourdough" richer and tastier.


I also have read that people use the whey as a drink. I have not tried this yet. From what I gather it is very cooling in the summer and comforting in the winter. Adopting this would help at my house since we usually have more whey than we do uses in one week. You can freeze whey also, but you have to remember that it takes a long long time for it to defrost. Take it out of the freezer the night before.


I hope you try some recipes with your whey. Let me know how they turned out. And I will try some as a drink - anyone else game?


Monday, March 22, 2010

Some Harder Cheese (But Not Hard to Do!)

Since yesterday I talked about the making of yogurt and also shared how it can can fixed in various degrees - almost liquid, creamy and spreadable - I thought today I would tell you about a harder cheese, that can also be made a couple consistancies.

Again take a gallon of milk and while stirring constantly on high, let the milk come to a boil. This approximately takes 20 - 25 minutes. Have a collander ready lined with either a napkin or cheesecloth. Also a spoon that will drain will be used. Once the milk reaches a boil and starts to come up over the top of the pan, reduce the heat to about medium, or where it will manage to boil a little, but not make a mess. Now add lemon juice or apple cidar vinegar. Just spritz some in and watch the magic. Very quickly the curds and whey will start to separate. As the curds separate, gather them with your draining spoon and place them in the lined collander. You can add little more lemon juice or vinegar to make sure you can all the curds you can, I always do.

You can either use Whole or 2% milk here again. But, the more fat in it, the more curds. So with this cheese Whole Milk is usually the best. You also can add a cup to a cup and a half of Buttermilk to the milk and that also, when it boils will not only make fuller curds, but divides the curd and whey itself.

The addition of lemon juice, apple cidar vinegar and buttermilk is the addition of a rennet in your milk. All they do is divide the curd from the whey. There are many cheese making kits out there that sell a rennet. They are not inexpensive. With these 3, I find I can make all the cheese I need, with the occasional buying for special occasions.

Add salt to the curds right away. If there is any flavoring, in the way of spices, this is also the time to add it. Now you get to make some choices again. To just drain and leave it alone, this cheese is similar to "cottage cheese". You can also wrap the napkin around it tightly, squeeze and make a cheese ball. This will become a harder, more compact cheese, like the kind you would slice and put on a sandwich, but will not melt. Try both, they each have their uses.

Take the cheese ball out of the napkin/cheesecloth and store in a refrigerator container. It will not last more than about a week to 10 days. Remember there is no aging or preservative here, it is homemade. I find this cheese to be filling and I don't use as much at a time when putting on sandwiches, etc. So once again, you have a hefty amount of cheese for the price of a gallon of milk and a little lemon juice or vinegar.

Let me know how this goes for you! And save that whey again. We will use it tomorrow for the 1st time!

Sunday, March 21, 2010

Yogurt Musings and Recipe


We eat loads of yogurt at our house. All of us. Ron and I, the pups, the kitties. Loki the St. Bernard, has IBS, - yes, amazing isn't it? - and the only thing that really works is 3 heaping Tablespoons of yogurt with each of his 4 meals. The good thing is though, it really does work. Healthwise it is good for all of us and we love it. But have you looked at the store? Even the large economy containers are expensive if you are eating 1 - 2 gallons of yogurt a week. Which we do! With my recipe you make about 1 gallon of yogurt for the price of 1 gallon of milk - 1/4 at least, of the store bought cost.

So today I will share with you how I make both yogurt and Greek Yogurt. And in the next week, I will add, cheese, bread and soup. Why? Because they are all related in their ingredients, taking from one another. I love Food Science, and hope you will enjoy it too!

We don't use Yogurt Makers here. The ones I have seen, we would have to use them 3 times a day to get the quantity of yogurt we eat. I use a large pan that easily holds a gallon of milk. This is very important. Because if you use less milk with this method, it cools too quickly and doesn't actually make yogurt. And the milk, you can use Whole or 2%. Less than that does not give you as much yogurt and it is too watery.

Put your stove setting on high, we want to ALMOST boil the milk. This process is very meditative for me, enjoy it. While the milk is heating to 175 to 180 degrees, stir absolutely constantly. Watch the change in the milk's consistancy and color. In a short period of time of making yogurt regularly, you will be able to see the milk change and practically tell when it is ready by sight. In my pan, which is coated metal, it takes 15 minutes to get the milk to 175 degrees.

Now turn your stove off and let set until it is between 110 and 120 degrees. Again, mine take about 50 minutes, in a metal coated pan. Now the 1st time you make yogurt you need to buy regular, NEVER FLAVORED, yogurt. The luncheon size, what is it 6 - 8 oz? The first time, I use a lot of starter to insure thick creamy yogurt. After the initial batch, I use about 1/4 of a cup or if you want to use "freeze dried starter" from the health food store, 4 packets. (The starter in packets is really nice to have around for emergercy. You know, like you ate all the yogurt and forgot to keep some for starter.) Put the entire contents in the warm milk and stir well. Put your lid on and move the yogurt to a place where you will not disturb it. You will be putting the yogurt "to bed" now. We use a flannel sheet and cover the entire pan, with lid on. A wool blanket or winter coat will also work. The idea is that the yogurt needs to cool slowly. Often it is lukewarm still when we open it in the morning.

Let sit over night, or all day if you made it in the morning. And put it in refridgerator containers. I have found not to flavor the yogurt until you are ready to eat it. The yogurt will last longer without anything in it. Often you will see liquid lying on top or just under the surface. Just stir it in, it is whey folks.

NOW - GREEK YOGURT
Ron and I discovered Greek Yogurt in Florida and went nuts over it. We brought 1/2 a dozen containers back and actually thought of having it shipped to us. That's when I decided I could probably learn to make it. It is sooooo simple, you are allowed to giggle, ok?

Take that yogurt you just made. You can use cheesecloth, or I use a thin cloth napkin, and line a collander with it. Put this collander on top of a bowl. Spoon in yogurt and let it sit for 3 - 4 hours. The whey will drain into the collander, the yogurt becomes thick - which equals, Greek Yogurt! Refrigerate and enjoy.

Two things now. DO NOT THROW AWAY THE WHEY! Place it in a refrigerator container, we will use it later this week, often.
And if you continue to let the Greek Yogurt drain, you will have "cream cheese". I like to add Mexican or Italian or Indian seasoning and use as a sandwich spread or cracker dip.

Let me know how yours turn out! And later this week we will work with the whey in breads and soups and make another simple cheese.

Wednesday, March 17, 2010

HAPPY ST PAT'S DAY!


Funny Hats - check

Green cookies w/green icing - check

Planted Potatoes - check


Saturday, March 13, 2010

SEED TIME


So after a long hiatus from blogging I took the challenge AGAIN to blog every other day. You would think that I would get a lot done with being snowed in for so long. Well, I did, but not blogging or writing. I went through every cupboard, drawer, closet, file cabinent (the ones that are mine) nook and cranny in our home and decluttered. So since all of that is done, with the good weather I can spend time outside with the pups and start gardening.

Next Wednesday is St Patrick's Day and also the day to plant potatoes, in case anyone else will be out there attempting this feat. I will be. I am told to do it rain or shine, but I am just happy I am not digging through snow to do so.

I have also been reading a book on gardening by one of the Mother Earth people, Gardening When It Counts. In reading ahead, I contacted the seed catalogs suggested early and this week I started going through and pricing what things we needed, wanted and how we are doing. The seed catalogs I went through, Johnny's and Stokes, are great catalogs, but very expensive. These seeds produce unaltered veggies, etc and you can harvest the seeds from the fruits and use them again. Sounds good right? Well, yes, I had lots of choices and I started making a preliminary list of seeds. But.... seeds of this degree are very expensive.

This is the 1st year I will be gardening looking at an entirely new method and with the thought of canning some of the harvest. I had thought that I also could save seeds for next year. It all sounds good in theory, but these seeds are too much to risk on a 1st year. It would be devastating to go out on a limb, with this cost, and not be able to follow through.

So I am re-grouping. I am still making my list and going through the catalogs for research sake. But, Tuesday when I go to my normal store to buy by potatoes to plant and onions, I will also pick up seeds. Regular seeds in the stores, with some sold in quantities to farmers. Then if I am not able to keep up with things, I can learn what I can do without such a costly lesson.

Am I disappointed? A little. I always think I can find the greener way and that it will be cost effective. Not here, not for now. One step at a time, even perhaps baby steps.

The flowers this year I am focasing on perenials and I will order from a nursery. The kitchen garden will be put near the front door amidst the flowers. For the front yard wildflowers, forest flowers and bulbs will be what I focus on, with some flowering bushes, to ensure color each year.

So that's my plan and I will try to keep you up to date on how it is going. If you have any ideas - please - I am open!